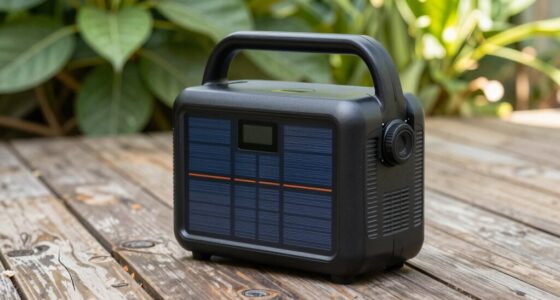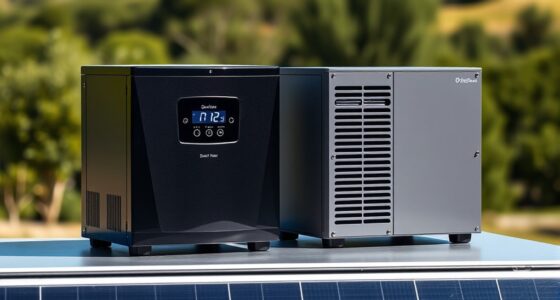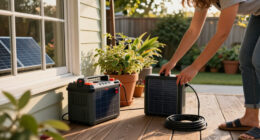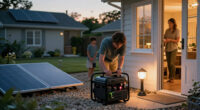
This guide helps homeowners set up and test a portable solar generator—a battery power station charged by solar panels—for essential devices during an outage. It covers sizing, placement, charging, safe appliance connections, and a basic backup test. It is for beginners who can follow appliance manuals; permanent home wiring requires a licensed electrician. Allow 2–4 hours for planning and setup, then additional time to charge the battery.

Get backup power and energy gear delivered free with Prime
- Fast, free delivery on millions of items
- Prime Video, Amazon Music and more included
- Member-only deals all year
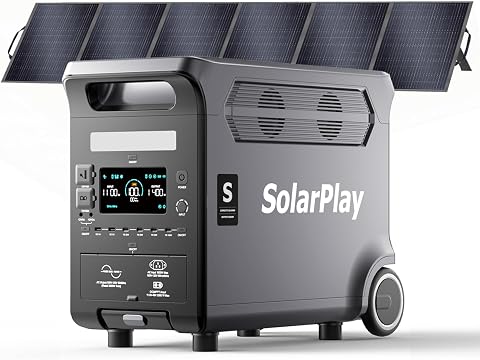
SolarPlay Q3600 Portable Power Station with 400W Solar Panel, 3840Wh LiFePO4 Battery
- ✔ Battery capacity: 3,840Wh
- ✔ Battery chemistry: LiFePO4
- ✔ Continuous output: 3,600W

ZeroKor 300W Portable Power Station with 60W Solar Panel
- ✔ Maximum output: 300W
- ✔ Solar panel: 60W monocrystalline
- ✔ AC outlets: 2

Jackery Explorer 300 Portable Power Station (292Wh)
- ✔ Capacity: 292Wh
- ✔ Battery chemistry: LiFePO4
- ✔ Weight: 7.5 pounds
Difficulty: Beginner | Time: 2–4 hours for planning and setup, plus charging time
What You’ll Need
Tools & Materials:
- Portable power station with a built-in battery and inverter
- Compatible solar panels and the manufacturer-approved cables
- Appliance labels or manuals showing running and starting wattage
- Notebook or spreadsheet for a load list
- Phone or clock to track charging and test runtime
Knowledge:
- Basic ability to read appliance power labels and follow product manuals
- Ability to distinguish a portable plug-in setup from permanent home wiring
Check the power station’s manual for its usable battery capacity, continuous AC output, surge rating, solar input limits, connector type, and temperature limits. Keep the manuals and warranty information. Never connect a portable generator to a wall outlet or home circuit; backfeeding can cause electrocution or fire. Have an electrician install a transfer switch or other approved connection if you want to power household circuits.
SolarPlay Q3600 Portable Power Station with 400W Solar Panel, 3840Wh LiFePO4 Battery
When backup means keeping more than a phone and a laptop going, the SolarPlay Q3600 has a substantial advantage over the other two picks. Its 3,840Wh LiFePO4 battery and 3,600W continuous output give it much more headroom for a wider mix of household devices than either the 300W ZeroKor or the 292Wh Jackery. The stated 5,500W surge capacity may also accommodate brief startup demands, but we should still check the specific appliance’s requirements before relying on it.Its solar setup is capable, though not as complete as the headline capacity might suggest. A 400W panel is included, while the station accepts up to 2,000W of solar input. Reaching that ceiling requires additional compatible panel capacity; with the included panel alone, recharging will take longer than with a larger array. The station also supports AC charging and has UPS mode with a stated switchover of 20 milliseconds or less, which can suit some home backup arrangements. We should confirm that timing and operating behavior meet the needs of sensitive equipment rather than assuming it replaces every dedicated UPS.At 93.7 pounds, this is a wheeled unit for moving around a home or campsite, not a grab-and-go station. Compared with the ZeroKor and Jackery, it offers far more stored energy but asks for more space and effort to position. It makes the most sense for buyers prioritizing capacity and output; those seeking a lightweight emergency kit should choose a smaller model and plan for shorter runtimes.
Pros:
- 3,840Wh LiFePO4 battery provides much greater stored energy than the compact alternatives.
- 3,600W continuous output supports a wider range of loads than either 300W-class station.
- Includes a 400W solar panel and supports up to 2,000W solar input.
- Wheels, telescopic handle, and UPS mode add practical home-backup features.
Cons:
- At 93.7 pounds, it is difficult to carry and needs a deliberate storage and placement plan.
- The included 400W panel is well below the station’s 2,000W maximum solar input.
- Solar charging speed and runtime depend on conditions and the connected load.
Best for: Households that want substantial stored power for multiple devices and can accommodate a heavy, wheeled station.
Not ideal for: Buyers who need a lightweight unit, a compact hiking setup, or a rapid solar recharge from the included panel alone.
Bottom line: For buyers who need meaningful outage capacity and can manage the weight, SolarPlay is the strongest all-around backup choice in this group.
“For buyers who need meaningful outage capacity and can manage the weight, SolarPlay is the strongest all-around backup choice in this group.”
ZeroKor 300W Portable Power Station with 60W Solar Panel
The ZeroKor 300W is the simplest of these picks to understand as a small solar backup kit: the station and a 60W monocrystalline panel come together, and the battery can also recharge from AC or a 12V car port. That bundle is useful for buyers who want to try solar charging without first sourcing a separate panel, an advantage over the Jackery package described here. Its two AC outlets, DC output, and USB ports cover common small electronics, while the panel can charge compatible devices directly.The tradeoff is scale. At 300W maximum output, ZeroKor sits far below SolarPlay’s 3,600W rating and should not be treated as a household appliance generator. A device drawing more than its limit can damage the unit, so buyers need to check the actual load rather than rely on connector compatibility. The included 60W panel also favors gradual replenishment and small-device use; it cannot match the SolarPlay’s included 400W panel, much less its 2,000W maximum solar input.For a compact emergency kit, occasional outdoor use, or charging modest electronics, this is a more complete starting point than the Jackery if having a panel in the box matters. The compromise includes a non-waterproof panel junction box that must stay dry, and the supplied guidance to maintain battery charge between 60% and 80% may not fit everyone’s storage habits. Choose it for its included solar hardware and modest loads, not as a substitute for higher-capacity home backup.
Pros:
- Includes a 60W monocrystalline solar panel, unlike the Jackery package described here.
- Supports AC, car, and solar recharging for flexible replenishment options.
- AC, DC, and USB outputs cover a range of small electronics.
- Built-in flashlight includes reading and SOS modes.
Cons:
- The 300W maximum output rules out loads that draw more power.
- The 60W panel is small beside SolarPlay’s 400W panel and supports slower replenishment.
- The solar panel junction box is not waterproof and must be kept dry.
Best for: Buyers building a modest backup or outdoor kit who want a small station with a solar panel included.
Not ideal for: Anyone planning to power high-draw appliances, sustain many household devices, or leave the panel junction box exposed to wet conditions.
Bottom line: ZeroKor is the practical small-kit pick when an included panel matters, as long as its 300W ceiling matches the devices you intend to run.
“ZeroKor is the practical small-kit pick when an included panel matters, as long as its 300W ceiling matches the devices you intend to run.”
Jackery Explorer 300 Portable Power Station (292Wh)
If carrying comfort is the priority, the Jackery Explorer 300 is the most portable choice here. At 7.5 pounds, it is far easier to pack for a camping trip than the 93.7-pound SolarPlay, and its 292Wh battery can support small electronics such as phones, laptops, or other compatible devices. The 100W USB-C PD port is useful for charging suitable equipment directly, while the AC, USB-A, and car ports provide several connection options.Its strengths do not translate into extended home backup. With 292Wh of capacity and a stated 300W rated output, it has much less energy and power than SolarPlay; even ZeroKor offers an included solar panel while Jackery’s package does not. The supplied description states that a compatible 100W panel can bring the battery to 80% in about 2.8 hours, but buyers must acquire that panel separately, and actual results depend on sunlight and setup. That makes the Jackery a portable station that can support solar recharging once equipped, rather than the most ready-to-use solar bundle in this comparison.LiFePO4 chemistry and a stated 4,000-plus charge cycles to 70% capacity are appealing for frequent use over time. Still, the small battery means we should plan carefully around device draw and expected duration. The Jackery is the right pick for people who value a light pack and essential electronics; anyone prioritizing longer outages, high-draw appliances, or a panel included with the station should look first at SolarPlay or ZeroKor.
Pros:
- At 7.5 pounds, it is much easier to carry than the other two stations.
- LiFePO4 battery is rated for more than 4,000 cycles to 70% capacity.
- 100W USB-C PD, AC, USB-A, and car outputs support varied small-device charging.
- A compatible 100W panel is stated to charge it to 80% in about 2.8 hours.
Cons:
- The 292Wh battery offers far less stored energy than SolarPlay’s 3,840Wh.
- Solar panels are not included, unlike the ZeroKor and SolarPlay bundles.
- Its 300W rated output is insufficient for many high-draw appliances.
Best for: Campers and travelers who want a light power station for essential electronics and are willing to source a compatible solar panel.
Not ideal for: Households needing long-duration outage coverage, high-power appliances, or a complete solar bundle out of the box.
Bottom line: Jackery is the easiest model to bring along, but its compact capacity and separately sourced panel make it a personal-device backup choice rather than a home-outage workhorse.
“Jackery is the easiest model to bring along, but its compact capacity and separately sourced panel make it a personal-device backup choice rather than a home-outage workhorse.”
As an Amazon Associate we earn from qualifying purchases.
Before You Start
Make a plan for the devices you need during an outage, such as phones, lights, a router, or a medical device. A solar generator may not support high-demand appliances such as space heaters, electric kettles, air conditioners, or well pumps. Keep fuel-powered generators outdoors and away from doors and windows; this guide covers battery and solar equipment only. Do not use a power station or panel with damaged cables, a swollen battery, or signs of water intrusion.
Step-by-Step Instructions
Step 1: List the devices you need to power
Write down each essential device, its wattage, and how many hours per day you expect to use it. Find wattage on the label or in the manual. If a device lists volts and amps instead, multiply volts by amps to estimate watts. For devices with motors or compressors, record starting or surge wattage too; refrigerators and pumps can briefly draw much more power when they start.
Estimate daily energy use by multiplying each device’s watts by its expected hours of use, then add the results in watt-hours. For example, a 10-watt light used for 5 hours uses about 50 watt-hours. The actual draw can vary, so treat estimates as a planning guide.
Tip:Plan to run only essential devices and use them in shifts. This reduces battery demand and may let you buy a smaller system.
Check: You have a written list showing each device’s running watts, any known starting watts, and estimated daily watt-hours.
Step 2: Choose a power station that fits the load
Compare your load list with the station’s specifications. The total running wattage of devices used at the same time must stay within its continuous output rating. A device’s starting surge must also fit within the station’s surge rating. Check that its battery capacity can cover your planned energy use; battery capacity is usually shown in watt-hours, but the energy available at the outlets will be lower because of conversion losses.
Choose a station with the correct output sockets and charging inputs for your devices and panels. For medical equipment, confirm compatibility with the equipment provider or manufacturer, and plan a backup if an interruption could be dangerous. Do not rely on a battery capacity rating alone as proof that the station can start a motor or run every appliance.
Tip:Leave room for unexpected use and reduced solar charging on cloudy days. Check the manual for limits on simultaneous AC, USB, and solar charging.
Check: The station can handle the planned simultaneous running load and surge, and its usable capacity matches your intended runtime with a reasonable reserve.
Step 3: Inspect and position the equipment
Place the power station indoors in a dry, well-ventilated area within the temperature range listed in its manual. Keep it away from direct heat, moisture, flammable materials, and places where it could be knocked over. Leave the required clearance around vents, and do not cover the unit while it is running or charging.
Inspect the station, panels, and cables for cracks, exposed wires, loose connectors, or other damage. Set panels outdoors where they receive direct sun and cannot be easily blown over or tripped over. Route cables away from walkways, standing water, sharp edges, and closed doors that could pinch them.
Tip:Solar panels can produce power whenever they receive light. Follow the panel manual when connecting or disconnecting them, and do not touch exposed electrical contacts.
Check: The station is stable, dry, ventilated, and undamaged; panels are secured in a sunny location; cables are protected from damage and foot traffic.
Step 4: Charge the battery and confirm solar input
Charge the power station using the method described in its manual. If using solar panels, connect only compatible panels and cables, and stay within the station’s maximum solar voltage, current, and input wattage. Observe any required connection order. Never combine panels in series or parallel unless both manuals allow that configuration.
Check the screen or app for solar input and battery level. Adjust panel placement or angle if input is low, while keeping the panels stable. Charging time depends on sunlight, panel output, battery size, and the station’s input limit. If the battery is not full before an outage, note its current charge and adjust your planned loads.
Tip:Clouds, shade, dirt, and poor panel angle can sharply reduce charging. Keep panels clean using the care instructions, and do not use abrasives or solvents unless the manufacturer permits them.
Check: The station reports charging from the selected source, and the battery percentage rises over time under suitable conditions.
Step 5: Connect essential devices safely
Turn off or unplug the devices before connecting them. Plug each device directly into the correct outlet on the power station, then turn the station on and start devices one at a time. Watch the display for output watts, overload warnings, and battery drain. Keep the combined load within the station’s continuous rating and any limits for individual outlets.
Use the station’s USB ports for compatible phones or small electronics when practical. Do not connect the station to a wall receptacle, household wiring, or another power source in a way the manual does not explicitly support. Avoid power strips unless the manufacturer permits them and their total load stays within the station’s rating.
Tip:Start motor-driven devices separately so their startup surge does not overlap. Stop using a device if the station displays an overload or fault.
Check: Each selected device runs normally, the station shows an expected output level, and no overload, overheating, or fault warning appears.
Step 6: Run a backup test and record runtime
Test the setup during normal conditions rather than waiting for an outage. Charge the station, connect your planned essential devices, and run them for a realistic period while noting the battery percentage and displayed load. Check that devices remain powered and that the station stays within its temperature and output limits.
Use the observed battery drain to revise your runtime estimate. If the battery drops faster than expected, reduce device use, shorten operating hours, or add compatible charging capacity. Record the final setup: device list, approximate wattage, panel configuration, cables, and any instructions for other household members.
Tip:Do not test critical medical equipment by disconnecting its normal supply unless its provider has approved the procedure and another safe backup is ready.
Check: The planned devices operate without faults during the test, and you have a written estimate of how long the battery can support the selected load.
Common Mistakes to Avoid
- Leaving the station in a hot, wet, or poorly ventilated location. — Follow the station’s temperature and clearance requirements, and keep the unit dry and unobstructed.
Troubleshooting
Problem: The station or cable becomes unusually hot, smells burnt, or shows a fault.
Solution:
Turn off the station if it is safe to do so, disconnect loads without touching damaged or hot parts, and move people away from the equipment. Do not resume use until the manufacturer or a qualified service provider has assessed it. If there is smoke or fire, leave the area and contact emergency services.
What Success Looks Like
Your setup is ready when the station and panels are undamaged and safely placed, solar charging registers correctly, and the selected essential devices run together without overload or fault warnings. You have recorded an observed runtime estimate, know how to reduce the load, and have kept the equipment manuals available. Permanent household circuits remain disconnected unless a licensed electrician has installed an approved transfer arrangement.
Next Steps
Store the station and cables according to the manufacturer’s guidance, and keep the panels protected when they are not in use. Check the battery level at the interval recommended in the manual, recharge it after use, and inspect cables and connectors before each outage season. Repeat the backup test after changing devices, panels, or settings. Arrange a professional review if you need to power fixed household circuits or have questions about medical equipment.
Frequently Asked Questions
Can a solar generator run a refrigerator?
Possibly. Check the refrigerator’s running and startup watts, then compare them with the station’s continuous and surge ratings. Estimate daily energy use and account for the fact that compressors cycle on and off. Test the refrigerator with the station before relying on it during an outage.
Can I leave the solar panels connected all the time?
Follow the station and panel manuals. Some systems support ongoing solar charging; others require specific operating or storage conditions. Disconnect panels before maintenance or when directed by the manufacturer, and keep connectors dry and undamaged.
How many solar panels do I need?
Base the panel setup on your daily energy use, available sunlight, and the station’s allowed solar input. Add compatible panel capacity within the station’s voltage, current, and wattage limits. More panel nameplate watts do not guarantee that the station will accept more than its input limit.
Can I run the generator indoors?
A battery power station does not burn fuel, but it still needs dry, ventilated placement within its specified temperature range. Keep it away from heat and moisture, and do not block its vents. Fuel-powered generators must never be operated indoors.
Can I connect the station to my home’s electrical panel?
Only through equipment designed and installed for that purpose, such as a compatible transfer switch installed by a licensed electrician. Never plug the station into a wall outlet to feed household wiring; that can energize utility lines and create a severe shock or fire hazard.